
A solid content creation workflow is the engine that keeps your YouTube channel running. It’s what turns those “what if I made a video about…” thoughts into a steady stream of great content your audience loves.
Forget complicated flowcharts and rigid rules. A good workflow is just a simple, repeatable roadmap. It takes you from that first spark of an idea all the way to hitting “Publish”—all without the creative burnout. Honestly, this kind of system is the secret sauce behind every single creator who manages to upload consistently.
Building Your Foundational YouTube Workflow
Let’s get real for a second. Staring at an empty content calendar is terrifying. A strong foundation is what separates the channels that post once in a blue moon from the ones that are actually growing. We’re going to focus on the pre-production stage—turning those fuzzy ideas into a solid plan of attack before you even think about hitting the record button.
This planning phase isn’t just bureaucratic busywork. It’s the key to making the entire creation process smoother and way less stressful. Trust me, putting in the time upfront saves you from massive headaches later. You’ll build momentum and a sense of clarity that carries you through everything else.
From Vague Idea to Actionable Plan
It all starts with brainstorming. Don’t just sit around waiting for a brilliant idea to fall out of the sky. You have to actively hunt for them. Build up a backlog of video topics so you’re never starting from scratch.
I like to spy on competitor channels, dig through my own comment section for questions, and use keyword research tools to see what people are actually searching for on YouTube.
Once you’ve got a running list of potential ideas, it’s time to give them some structure. This is where scripting and storyboarding become your best friends.
- Scripting: This doesn’t have to be a word-for-word manuscript (unless that’s your style!). It can be as simple as a bulleted list of your main talking points. A script just makes sure your delivery is tight and you don’t ramble or, even worse, forget to mention something important.
- Storyboarding: You don’t need to be Picasso. A few basic stick figures can work wonders for visualizing your video’s flow. It helps you plan out your shots and figure out what props or graphics you might need ahead of time.
A classic rookie mistake is jumping straight into filming with a half-baked idea. This almost always leads to a painful, drawn-out editing process because the story wasn’t clear from the beginning. A 30-minute planning session can genuinely save you hours in post-production.
Creating a Consistent Schedule
With a backlog of planned-out videos, you can finally build a content calendar. This is your command center for consistency.
Start scheduling your video topics, your filming days, and your target publish dates for the next few weeks, or even a month out. This simple act completely removes that weekly “Oh no, what am I going to post?” panic.
Lastly, make a pre-flight checklist for filming days. It sounds simple, but it’s a lifesaver. List out every single piece of gear, every prop, and any notes you need. This little checklist prevents those gut-wrenching moments when you’re all set up and realize your camera battery is dead or you forgot the one crucial item you needed for a demo.
Putting this foundation in place is what turns a chaotic hobby into a sustainable, creative machine.
Breaking Down the 4 Phases of YouTube Content Creation
Let’s be real: running a successful YouTube channel isn’t about just winging it and hoping for viral hits. The creators who see consistent growth aren’t just creative; they’re methodical. They have a system, a content creation workflow, that turns chaotic brainstorming into a reliable production line.
Think of it as four key stages. Each one flows directly into the next, and if you skimp on one, you’ll feel the pain later on. A solid plan here is the difference between a smooth, enjoyable process and a frantic, stressful mess.
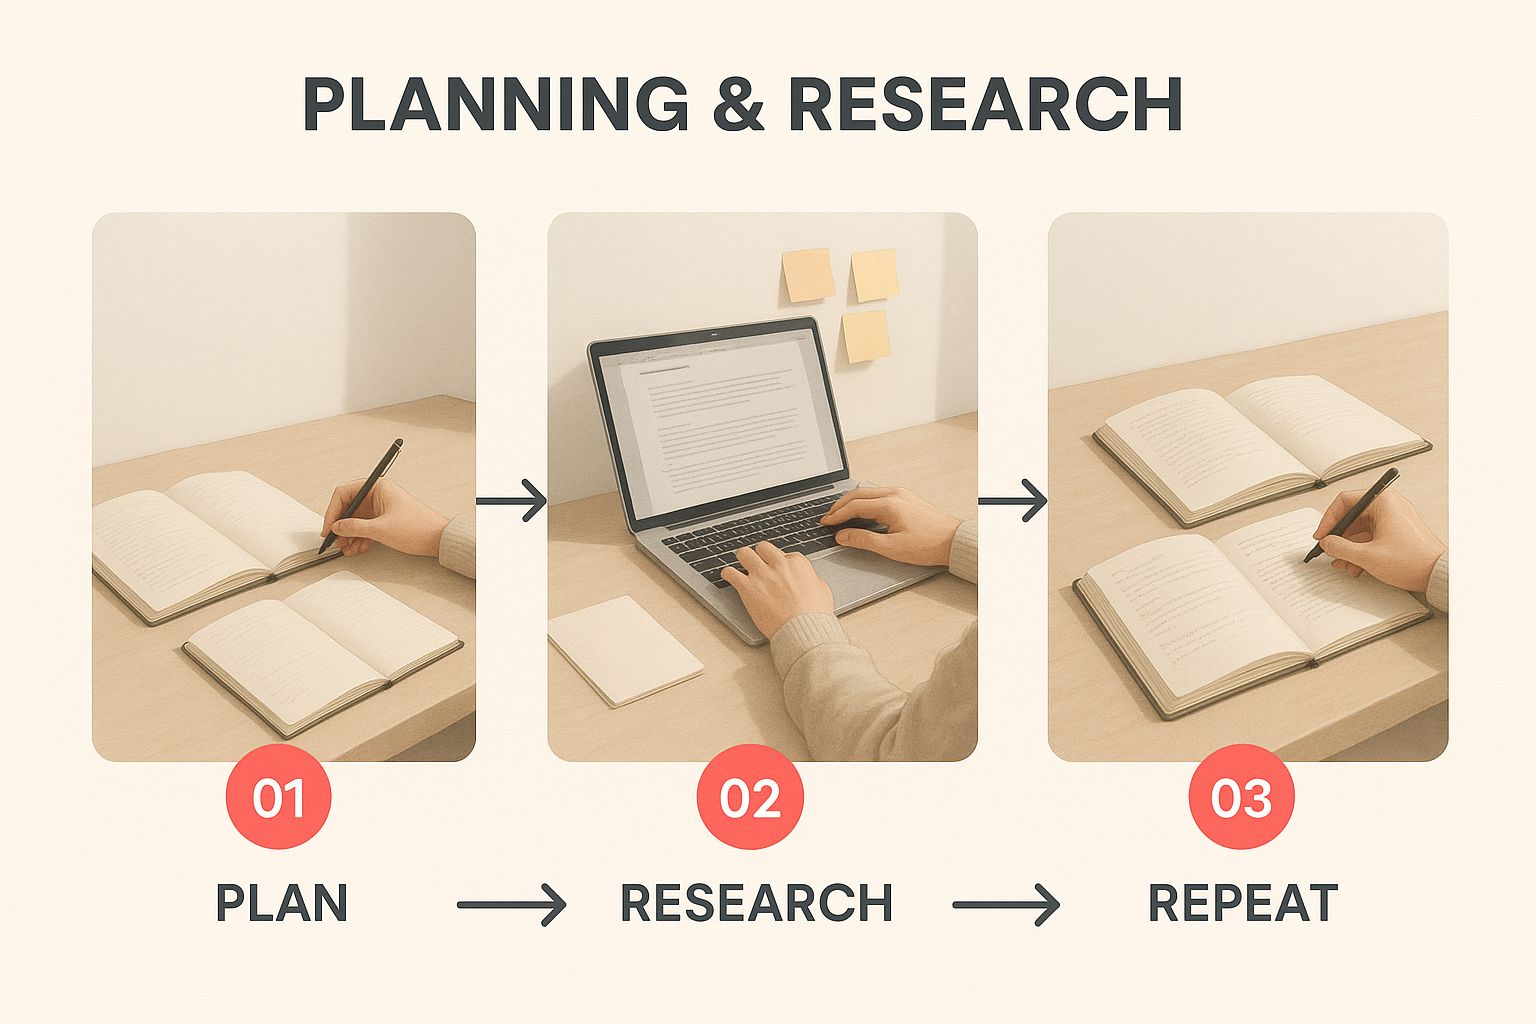
The image above nails it. A clean, organized planning space sets the stage for everything that follows. When your ideas and research are laid out clearly, the actual doing becomes so much easier.
Let’s walk through what this looks like in practice.
A repeatable workflow is the backbone of any serious YouTube channel. To make this concrete, here’s a breakdown of the four essential phases, what happens in each one, and what you’re trying to achieve.
The Four Phases of a YouTube Workflow
| Phase | Key Activities | Primary Goal |
|---|---|---|
| Phase 1: Ideation & Planning | Keyword research, competitor analysis, scripting/outlining, brainstorming titles & thumbnails. | To develop a data-informed video concept with a high probability of success. |
| Phase 2: Production | Setting up gear, filming A-roll and B-roll, recording voiceovers, capturing clean audio. | To execute the plan and capture all necessary raw assets efficiently. |
| Phase 3: Post-Production | Video editing, sound mixing, color correction, adding graphics and effects, finalizing the thumbnail. | To assemble the raw assets into a polished, engaging, and professional-looking final video. |
| Phase 4: Distribution & Promotion | Uploading, writing SEO-rich descriptions, publishing, and sharing on social media/email. | To ensure the finished video reaches its target audience and gets initial traction. |
By treating these as distinct but connected steps, you bring order to the creative chaos and ensure no critical task gets forgotten.
Phase 1: Ideation and Planning
This is where your video is born, and it’s so much more than just a random brainstorm. This is your strategy session. You’re digging into keyword research to see what people are actually searching for, checking out what top competitors are doing, and sketching out a solid outline for your video.
A pro tip that saves a lot of heartache: plan your title and thumbnail concepts from day one. A brilliant video with a boring thumbnail is a video nobody clicks on. You can even test-drive your ideas with a tool like Thumb Scout to see which visuals actually catch the eye before you sink hours into filming.
Phase 2: Production
It’s go-time. Production is all about bringing your blueprint to life. This is where you hit record, which includes setting up your camera and lights, making sure your audio is crystal clear, and filming all your core footage (A-roll) and any supplemental shots (B-roll).
The biggest mistake I see creators make is trying to “figure it out” on camera. If you don’t have a solid plan from the first phase, your shoot will feel chaotic. You’ll waste time, miss shots, and create a nightmare for your editor (even if that editor is you). The goal here is execution, not improvisation.
Phase 3: Post-Production
Here’s where the magic really happens. Post-production is where you take all those raw files and stitch them together into a compelling story. It’s not just about snipping out the “ums” and “ahs.”
This stage involves a few key tasks:
- Video Editing: Pacing the story, arranging clips, and weaving in B-roll.
- Audio Mixing: Making sure your voice, music, and sound effects all sound clean and balanced.
- Color Correction & Grading: Giving your video a consistent, professional, and visually appealing look.
- Adding Graphics: Using text, lower thirds, and animations to highlight key points and keep viewers hooked.
Before you call it done, it’s smart to peek at what’s worked for you before. Learning to read your YouTube video analytics helps you make smarter creative choices in the edit. And once your edit is locked, get that winning thumbnail finalized.
Phase 4: Distribution and Promotion
Hitting “Publish” isn’t the finish line. The final push is all about making sure your video actually finds its audience. This starts with uploading your video using an SEO-optimized title, a thorough description, and relevant tags to help YouTube understand what your video is about.
Then, it’s time to get the word out. Share your video on social media, in your email newsletter, or on relevant forums and communities. This initial promotion is what gives the algorithm a little nudge to start showing your video to more people. And remember, your thumbnail is your number one ad—make sure it’s a winner by checking it on Thumb Scout one last time before you share it everywhere.
Making the Magic Happen: Filming and Production
Alright, this is where all that careful planning starts to feel real. The production phase—the actual filming—can feel like a massive time sink, but it doesn’t have to be. With a bit of smart planning and a repeatable process, you can turn it from a dreaded task into a smooth, efficient part of your routine.
The first step? Set up a dedicated recording space. I’m not talking about a full-blown professional studio. A quiet corner of your room can work wonders. The goal is to have your lights, camera, and microphone more or less in the same spot every time. This simple habit cuts down on setup time dramatically and gives your videos a consistent, professional look that helps build your brand.
The Power of Batch Recording
If there’s one secret weapon for staying ahead, it’s batch recording. Instead of the one-and-done approach, you film several videos in a single, focused session. Honestly, this is a total game-changer for keeping a regular upload schedule without hitting burnout.
Imagine this: you block off one Saturday afternoon a month and knock out all four of your videos for that month. Just like that, you’re done filming for weeks. This gets you off the content treadmill and creates a fantastic buffer. You’ll have a backlog of content ready for editing, which frees up your mental energy for promotion and engagement. For an even bigger efficiency boost, explore our detailed guide on how to get more views on YouTube videos, which pairs perfectly with a solid production schedule.
A Few Key Production Tips
You don’t need a Hollywood budget to look and sound great. A few simple tricks can make a world of difference:
- Light it Up: A basic three-point lighting setup (key, fill, and back light) is ideal, but don’t sweat it if that’s too much. A single, large light source like a ring light or softbox placed in front of you can work wonders.
- Sound is Everything: Bad audio is a dealbreaker for most viewers. A decent USB or lavalier mic is a worthy investment. Also, try to record in a room with soft furnishings—carpets, curtains, even a blanket thrown over a chair—to absorb echo.
- Be Yourself: Don’t read your script word-for-word. You’ll sound like a robot. Instead, use your script as an outline with bullet points. This lets your personality come through naturally while still keeping you on track.
The real aim here is to create a reliable setup that just works. When you’re not constantly fiddling with tech, you can focus all your energy on what truly matters: delivering amazing content that your audience will love.
While you’re filming, don’t forget about your thumbnail! This is the perfect time to capture some high-energy, expressive photos specifically for it. Snap a few different poses and expressions. You can get a sense of what works by analyzing top-performing videos with the Thumb Scout Chrome extension. A quick look at what your competitors are doing with Thumb Scout can spark some great ideas. This tiny step can have a huge impact on your click-through rate. When you’re ready, you can finalize your design using the Thumb Scout Chrome Extension to make sure it pops.
Polishing Your Content: The Post-Production and Editing Phase
This is where the magic happens. Post-production is where your raw footage, audio clips, and rough drafts transform into a polished, compelling story. But let’s be honest, it can also become a massive bottleneck that drains your creative energy and throws your entire content schedule off track.
To keep things moving efficiently, you need a smart approach. It’s all about working smarter, not harder.
The secret to a faster edit actually starts before you even open your editing software. The moment you’re done filming or recording, get organized. I’m talking about a simple but powerful habit: create a dedicated project folder with subfolders for everything.
- A-Roll: Your main footage (like talking head shots).
- B-Roll: All that supplementary footage that adds context and visual interest.
- Audio: Separate tracks, voiceovers, music.
- Graphics: Logos, lower thirds, and other visual elements.
Trust me, this little bit of housekeeping upfront will save you from hours of frustrating digital treasure hunting later on.
Speed Things Up With a Template
Why start from scratch every single time? Creating a template for your projects is one of the biggest time-savers you can implement in your workflow.
A great template should have all your recurring elements pre-loaded and ready to go:
- Branded intro and outro: Already sitting in the timeline.
- Designated tracks: Placeholders for your main audio, background music, and sound effects.
- Standard graphics: Your lower thirds, call-to-action cards, and text styles are pre-made, ensuring your brand looks consistent every time.
When you start a new project, you just open the template, drop in your new footage, and you’re already halfway there. It’s not just about speed; it’s about building a recognizable, professional feel that your audience will come to know and love.
Once you have an idea for your thumbnail, do a quick sanity check. I use the Thumb Scout browser extension to see what the competition is doing. It’s a great way to make sure your concept will actually stand out in a crowded search results page.
The Final Polish and Export
Okay, your edit is done. Or so you think. Before you hit that export button, do one final review. Watch the entire video from beginning to end without stopping to make little tweaks. You’re looking for the big picture here—awkward pacing, weird audio dips, or jarring cuts that you’d otherwise miss when you’re zoomed in on the details.
After those final checks, it’s time to export. If you’re creating for YouTube, the gold standard is an MP4 file using the H.264 codec and AAC audio. Don’t worry about memorizing that; most video editing software has a simple “YouTube 1080p” or “YouTube 4K” preset that automatically handles these settings for you. It’s the easiest way to ensure your video looks great on the platform.
The demands on creators have changed so much. It’s not just about one thing anymore; it’s a mix of blogs, podcasts, and videos. With the average blog post now stretching beyond 1,400 words and 83% of consumers saying they want more video content, a streamlined process isn’t just nice to have—it’s essential for survival.
Your thumbnail is your video’s front door. It’s the single most important piece of marketing you’ll create for that piece of content. Make it count.
This brings us to the final, absolutely crucial step before you publish: your thumbnail. Don’t just guess if it’s good enough. Use the Thumb Scout Chrome Extension to preview exactly how your thumbnail will look next to your competitors’ right on the YouTube results page. It’s the best way I know to make sure all your hard work gets the click it deserves.
Let Smart Tools Do the Heavy Lifting
Here’s a hard truth about YouTube: working harder isn’t the key to success. Working smarter is. If you want to build a channel that lasts without hitting total burnout, you’ve got to find ways to reclaim your time. That means bringing smart tools and automation into your content creation workflow to handle all those repetitive, time-sucking tasks.
This isn’t about letting a robot take over your channel’s soul. It’s about building a solid tech stack that actually supports your creativity, freeing you up to focus on the big ideas and unique perspectives that only you can bring to the table.
Building Your Creator Tech Stack
The real goal here is to find tools that solve specific problems in your process. Think about your entire video pipeline, from that first spark of an idea to scripting, filming, editing, and finally publishing. Where are the biggest bottlenecks slowing you down?
- Project Management: I’m a huge fan of visual tools like Trello or Asana for this. You can set up a simple board where each video is a card. Then, you just drag that card through columns like “Idea,” “Scripting,” “Ready to Film,” and “Published.” It’s so satisfying.
- AI-Powered Editing: Let’s be honest, editing is where time goes to die. Thankfully, modern editing software can now automate the really tedious stuff—like zapping silent gaps, generating impressively accurate subtitle drafts, or even suggesting rough cuts. This can literally save you hours on every video.
- Thumbnail Research: Before you even think about opening a design tool, you need to know what a “good” thumbnail looks like in your niche. You could spend hours scrolling through YouTube manually… or you could use something like the Thumb Scout Chrome Extension to see real-time performance data right on the YouTube page.
AI is quickly becoming a standard part of the creator toolkit. In fact, it’s predicted that by 2025, a whopping 90% of content marketers will be using AI tools in their strategies. This shift isn’t just a trend; it’s happening because it delivers results. AI users consistently report better performance from their strategies than those who don’t use it.
Your job as a creator is to produce value. Any tool that helps you do that more efficiently is a worthwhile investment of your time and, often, your money.
Choosing the Right Tools
When you’re picking out tools, the golden rule is to avoid anything that just adds more complexity to your life. A good tool should feel intuitive and slot right into how you already work.
Many creators get stuck debating between different research tools. We’ve actually got a detailed comparison in our article on VidIQ vs TubeBuddy that can help. But at the end of the day, the best tool is simply the one you’ll actually use consistently.
Your tech stack should feel like a team of virtual assistants, each one handling a specific job so you can focus on being the creative director.
To give your content the best chance to succeed, start by analyzing the top-performing thumbnails in your niche. Then, put your own ideas to the test with Thumb Scout to see what actually grabs attention before you hit publish.
Common Questions I Hear About YouTube Workflows
Building a solid content creation workflow can feel like a huge mountain to climb when you’re starting out. To cut through the confusion, here are the real-world questions I hear most often from creators trying to find their footing.
How much time does one YouTube video realistically take?
It varies wildly, but a standard 10-minute talking-head video can easily take 8-14 hours. This breaks down into 2-4 hours for planning and scripting, 1-2 hours for filming, and 4-8 hours for editing. As your workflow gets smoother, you’ll definitely see that time drop.
How can I stay consistent without burning out?
Consistency beats frequency. The secret is to build a buffer by batch recording. Film 2-4 videos in one session. This creates a backlog, so when a crazy week hits, you won’t miss your upload. A steady video a week is more powerful than four in one month and then radio silence.
Should I have a different workflow for Shorts vs. long-form videos?
Yes, absolutely. Treat long-form videos as your main course and Shorts as appetizers. Don’t bog down a 60-second clip with a complex process. Use Shorts to snip highlights from longer videos, share quick thoughts, or jump on a trend. Keeping the workflows separate prevents you from getting overwhelmed.
What’s the most important part of the workflow to focus on first?
Without a doubt, nail down your Ideation and Planning phase. A great idea with a weak plan will fall apart in the edit. A good idea with a rock-solid plan, a clear script, and a killer thumbnail concept is a joy to produce. Master your planning before anything else. You can find more tips on building a strong foundation in our guide on how to be a successful YouTuber.
How do I know if my thumbnail is good enough before I publish?
Don’t guess—test. Your thumbnail is your video’s most important ad. A quick way to check its potential is to use a tool like the Thumb Scout Chrome Extension to see how it stacks up against top-ranking videos directly on the YouTube search results page. This simple check can make all the difference.